We measured five AI methods for making an immersive room panorama
One prompt, five AI methods, all measured on 4 November 2026: what each way of making a panorama for an immersive room costs, how long it takes and how much of its detail is real.
By 3walls · Published
The question: how to make a panorama for an immersive room
An immersive room shows one picture across three walls. Each wall is 1920 × 1080, so the whole picture is 5760 × 1080, a very wide 16:3 shape.
That shape is hard to make. It's far wider than a normal picture, and of the AI models (the software that draws a picture from a description) we tried, only one drew the full 5760 × 1080 directly. So there are several ways to reach that size, and they don't give the same result.
We asked: which method gives the most real detail, at what cost and in how much time?
We ran one prompt (the written description given to the AI) through five methods, and measured them on 4 November 2026.
What we found across the five methods
How we tested the five methods
Every method got this prompt:
A calm mountain lake at sunrise, ultra wide panoramic landscape, a small wooden sailboat near the centre, pine forests on both shores, layered blue mountain ridges, warm low sun, photorealistic, no people, no text.
We measured one run of each method through an API, which means software calling a model directly, not a person in a chat app. Costs are in US dollars, as of that date, from the billing of fal, the service we ran the models on. Times include queue wait, which varies: the same model, FLUX.2, took 68 s in method 2 and 16 s on a larger picture in method 4.
We measured two things:
- The share the model drew: how many of the final picture's pixels the model actually drew, counting only what's left if the picture was shrunk along the way. The upscaler invented the rest.
- The sharpness score: the variance of the Laplacian, a standard sharpness measure, on the final picture in grayscale. It shows how sharp the picture's edges are, comparable only between similar scenes. It rewards hard edges and invented texture: walls rendered separately, with obvious joins, scored highest, 950. So this page also shows full-size crops.
The exact models, as fal names them:
- Seedream 4.5: fal-ai/bytedance/seedream/v4.5/text-to-image
- FLUX.2: fal-ai/flux-2
- FLUX.2 Pro Outpaint: fal-ai/flux-2-pro/outpaint
- SeedVR: fal-ai/seedvr/upscale/image
- Hunyuan World: fal-ai/hunyuan_world
- Nano Banana 2: fal-ai/nano-banana-2
Seedream, FLUX.2 and Nano Banana 2 ran with seed 20261104, a number that sets the model's starting point.
What AI upscaling really does
None of the models we tried drew a picture 5760 pixels wide in one go with real detail. So the work happens at a smaller size and the picture is then enlarged, and four of the five methods here rely on that step.
Plain enlarging stretches the pixels a picture already has. The picture gets bigger and blurrier, and no new detail appears.
An AI upscaler has learned from huge numbers of pictures what things usually look like. While it enlarges, it draws in fine detail that wasn't there. Imagine asking an artist to redraw a blurry photo of a forest sharply: the trees stay where they were and look convincing, but the finest branches and needles come from what the artist knows about forests, not from the photo.
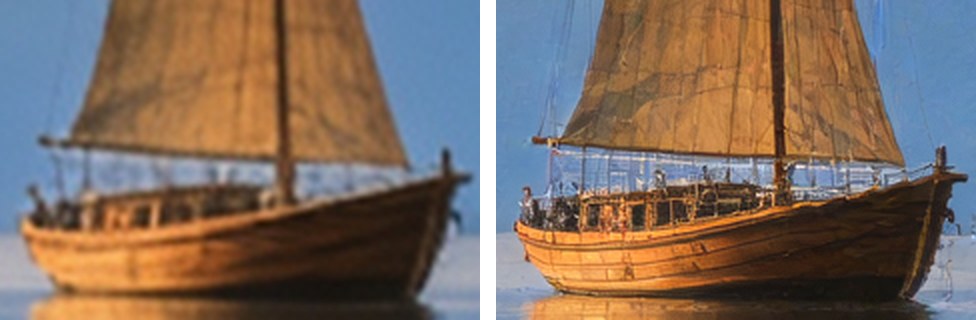
What "invented" means
It looks real and sharp, but it's the upscaler's guess, made from the small picture alone, with no knowledge of your description. By "real detail" we mean detail a model drew, not detail added while enlarging. In trees, water and clouds the guess rarely matters, because nobody knows how they were meant to look. It does matter for things that must be exact: text, faces, a map, a specific landmark.
Outpainting is a different tool, used in methods 3 and 4: you ask AI to continue a picture past its edges. That's a guess too, only here it fills whole new areas of the picture rather than fine detail.
Results: the five methods compared
| Method | Complexity | How | Cost per image | Time per image | Sharpness score | Share the model drew (approx.) | Best for | Avoid when |
|---|---|---|---|---|---|---|---|---|
| 1. Wide in one go | Low | API or Gemini chat | $0.047 | 27 s | 430 | 25% | A quick, cheap scene | Something must go on a specific wall |
| 2. Small, then upscale | Low | API | $0.031 | 80 s | 301 | 20% | Models that can't draw this wide | Fine detail seen up close |
| 3. Outpaint the sides | Medium | API | $0.247 | 44 s | 506 | 20% | One picture on the centre wall | Its full sharpness must survive |
| 4. Wall by wall | High | API; a person checks the joins | $0.624 | 74 s | 632 | 100% | The most real detail | Each wall needs its own chosen picture |
| 5. 360° panorama | High | API plus code to fix perspective | $0.197 | 663 s (about 11 min) | 449 | 7% | Turning the scene any way | Speed or fine detail matters |
We also asked two chat apps for a calm mountain lake at sunrise, at exactly 5760 × 1080. Gemini chat (Pro plan, Flash selected) took about 20 s and shows real texture, though the noise left by file compression flatters its 543. ChatGPT (Pro model selected) hit the exact size, but by its own account it generated 2172 × 724, then cropped and upscaled it.
One API test of a Gemini image model (Nano Banana 2 on fal), at its widest shape and largest size, returned 11712 × 1408, soft at full size.
Method 1: generate the panorama at full width in one go
- The model, Seedream 4.5, draws the full 5760 × 1080 from the prompt. We can't ask it for half that size: when we asked for 2880 × 540, it returned 8736 × 1920, a different size and shape. The picture is the right size, but up close the detail is only about half as fine as that size promises.
- Shrink it to half, 2880 × 540. The upscaler adds detail as it enlarges, so we give it a smaller picture to enlarge; and because the fine detail was never really there, halving loses almost nothing.
- Upscale ×2 back to 5760 × 1080. That's where the sharpness comes from. But half the width and half the height is only a quarter of the pixels, so the upscaler invents the other three-quarters.

Pros
- What we use at 3walls by default.
- The fastest of the five.
Cons
- Little control: ours gained a wooden deck nobody asked for.
Use it when the model can compose the scene for you.
Skip it when the layout matters more than speed.
Method 2: generate a small panorama, then upscale it
- The model draws 2560 × 480. That's the largest 16:3 picture this model, FLUX.2, can make on fal; it can't draw wider. It's only about a fifth of the pixels the walls need.
- Upscale ×2.25 to 5760 × 1080. Why 2.25? Because 2560 × 2.25 = 5760, the width of the three walls. The upscaler invents the missing four-fifths.

Pros
- The cheapest of the five.
Cons
- The fine detail is guessed.
Use it when budget comes first.
Skip it when people will stand close to the walls.
Method 3: outpaint the sides of a normal picture
- Start from a normal 16:9 picture, the shape of one wall, such as 1920 × 1080: the picture you want on the centre wall.
- Shrink it to 853 × 480 and centre it on an empty 2560 × 480 canvas. The outpainting tool only works up to 2560 pixels wide, so the whole three-wall picture has to fit that size first. Your picture takes the middle third.
- AI paints the empty sides so they continue the picture.
- Upscale ×2.25 to 5760 × 1080, because the canvas is smaller than the walls. This is also why your original loses some sharpness: it was shrunk, then enlarged.

Pros
- Works with your own photo or artwork.
Cons
- Even a sharp original comes out softer.
- The AI decides the sides: this model takes no prompt.
Use it when you already have the picture.
Skip it when you need a say in the side walls.
Method 4: generate wall by wall, then stitch
- The model draws the centre wall at its full 1920 × 1080. At full wall size, nothing has to be enlarged later.
- AI continues leftwards and draws a new wall 1920 wide, given only a 640-pixel strip from the centre wall's left edge. The AI has to see the edge to continue it, and 640 + 1920 = 2560 is the most the tool can handle at once.
- Do the same to the right, then join them: three walls of 1920 make 5760, and a model drew every pixel.

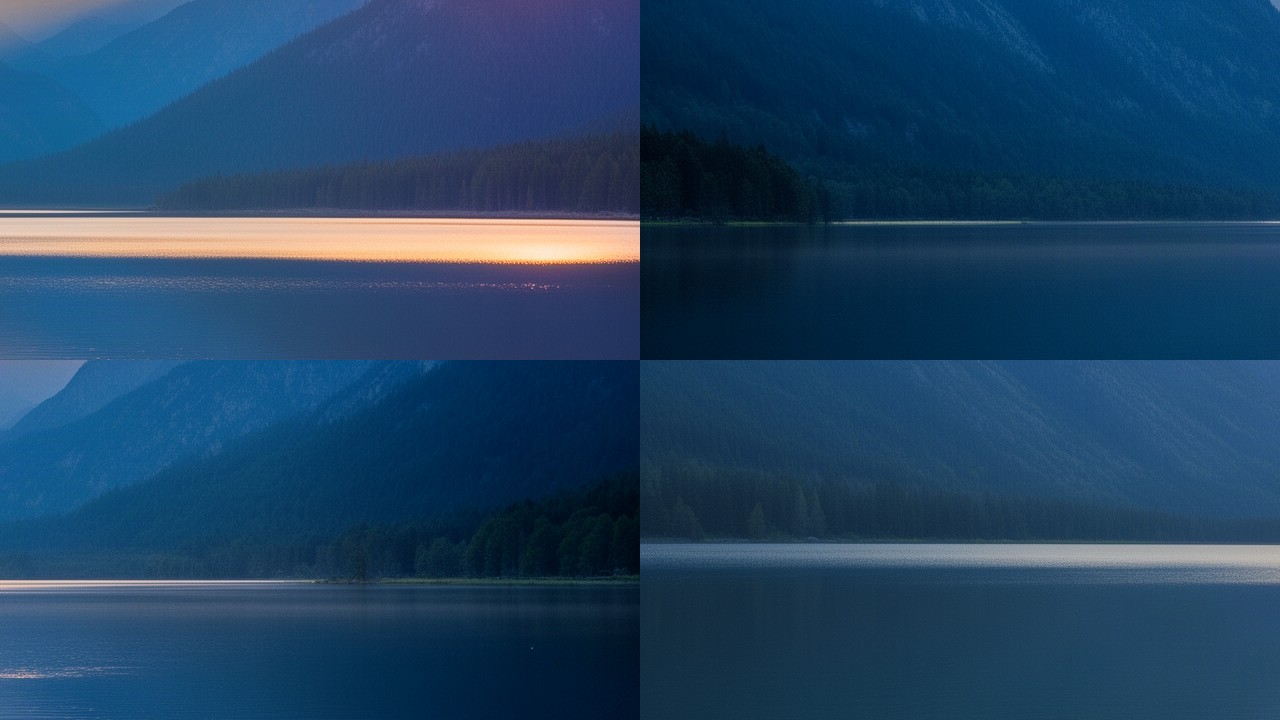
This version continues from the centre wall's edge: the joins line up, but the AI decides the side walls. Rendering each wall separately, with its own prompt, lets you choose every wall, but the joins don't line up:
Pros
- Models drew every pixel, with no upscaler.
Cons
- The most expensive of the five.
Use it when people will stand close to the walls and real detail is worth the cost.
Skip it when you need to choose what each wall shows: for that, render each wall separately and accept visible joins.
Method 5: generate a 360° panorama, then cut out the view
- AI turns a normal picture into a 360° panorama: a picture of the whole surroundings, as if you stood in the middle of the scene. The tool returned 1920 × 960, and that's all the detail the next steps have to work with.
- Cut out the band the walls see and correct its perspective, because a 360° picture bends straight lines and the walls are flat. From the middle of the room, each wall fills a quarter of the circle around you, so three walls see only three-quarters of the panorama: about 1440 of its 1920 pixels of width. Stretch that band to 2880 × 540, half the walls' size, so the upscaler can double it. Stretching adds no detail, so the band is soft.
- Upscale ×2 to 5760 × 1080. Only about 7% of the final pixels came from the model, so the upscaler invents most of the detail.

Pros
- The perspective fits the room.
Cons
- By far the slowest, nearly all of that time spent on the panorama.
Use it when you may want to turn the scene later: the panorama already holds the view behind you.
Skip it when you need the picture right away: in this test it took about 11 minutes.
Compare for yourself: full-size crops from each method
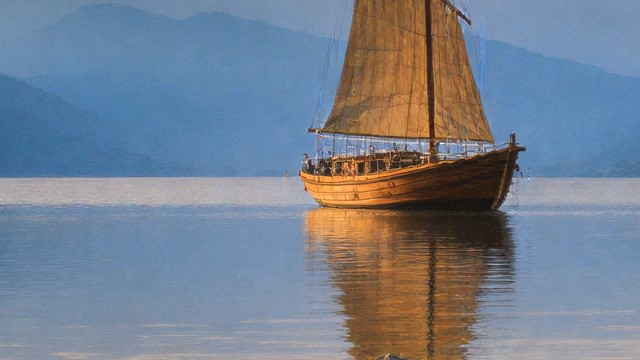
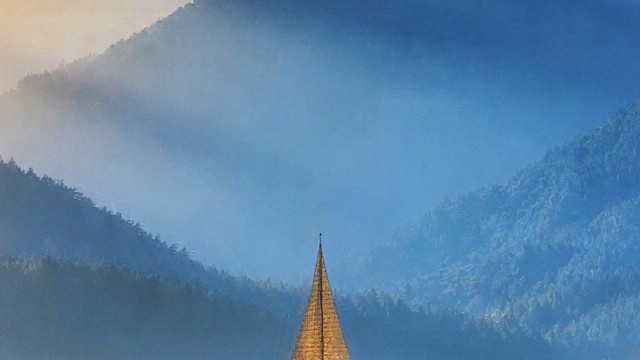
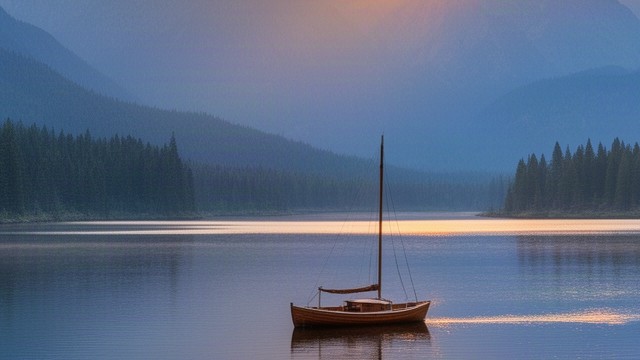
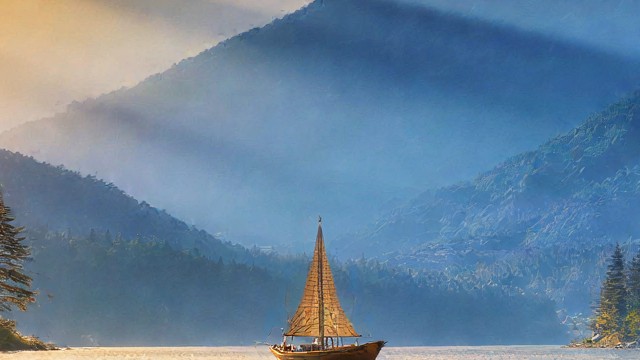
These are full-size crops from one fixed rectangle in each image, so the content differs: each model placed the boat elsewhere, and only methods 1, 4 and 5 show all of it. Compare texture, not subject.
Limits of this test
- One prompt: a landscape with no people or text. Results may differ for other scenes.
- One run of each method, so the figures are an example, not an average.
- Prices and models change.
- We didn't test full 3D worlds (Marble, or the 3D output of Hunyuan World, whose panorama method 5 uses). They add camera moves, at minutes per world.
Which method to choose for an immersive room panorama
From this one test, as a starting point:
- Quick and cheap: method 1, or method 2 if cost matters most.
- A specific picture on the centre wall: method 3, which starts from your picture.
- The most real detail: method 4, if the cost is acceptable and the AI may decide the side walls.
- A scene to turn in any direction: method 5, if you can wait about 11 minutes.
- No API, just a chat app: Gemini chat, which did better in the chat-app test above; enlarge its picture about 1.2× and crop it slightly to fill the walls.
If the picture matters, try two methods and compare them at full size.