How to Create Virtual Tours in 360° — A Complete Beginner’s Guide
Why Virtual Tours Matter: Turning Real Places Into Immersive Experiences
Creating 360 virtual tour lets you tell stories that go beyond photos or videos — it’s about letting people step inside your world.
Whether you’re a teacher, guide, or creator, a 360° virtual tour helps you capture places, memories, and experiences in an interactive, immersive way.
In this guide, you’ll learn how to plan, capture, and build your own 360° virtual tour — and how tools like The Third Product make the process simple and creative.
🎥 What Is a Virtual Tour?
A virtual tour is an interactive experience that allows users to explore real places through 360° photos or videos.
You can move from one scene to another, click on hotspots to reveal text, voice, or images, and even explore using a VR headset.
Virtual tours are widely used in:
Education: teaching history, geography, and culture through real places
Tourism: showcasing destinations before travelers arrive
Museums & heritage sites: preserving and sharing stories
Real estate & architecture: presenting spaces remotely
📸 Step 1 – Capture 360° Photos or Video
You can use any 360° camera — like Insta360, Ricoh Theta, or GoPro Max — to capture panoramic images.
Keep the camera steady, make sure the lighting is even, and if possible, hide the photographer using a tripod or edit it later (see our guide on removing yourself from 360° photos).
💡 Tip: even if you only shot a video, you can still extract a perfect still frame — learn how in our post
👉 Shot Video Instead of Photo? Here’s the Fix.
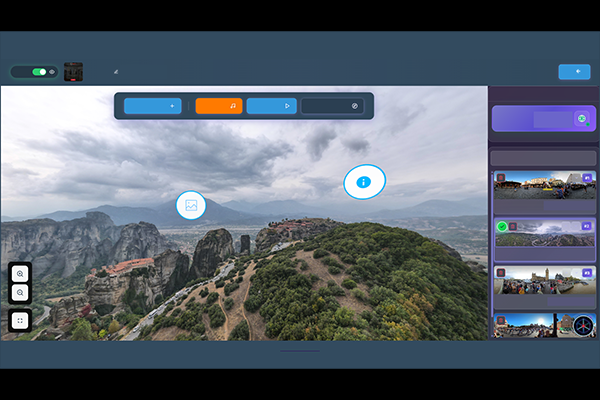
🧩 Step 2 – Build Your Tour
Once you have your images, it’s time to link them together.
You’ll need a virtual tour creation platform — and that’s where The Third Product Studio comes in.
Inside the Studio, you can:
Add hotspots to connect scenes or show info
Record or upload voice narration
Add text descriptions and multimedia
Control the starting angle or viewpoint of each scene
Preview and share instantly in browser, mobile, or VR
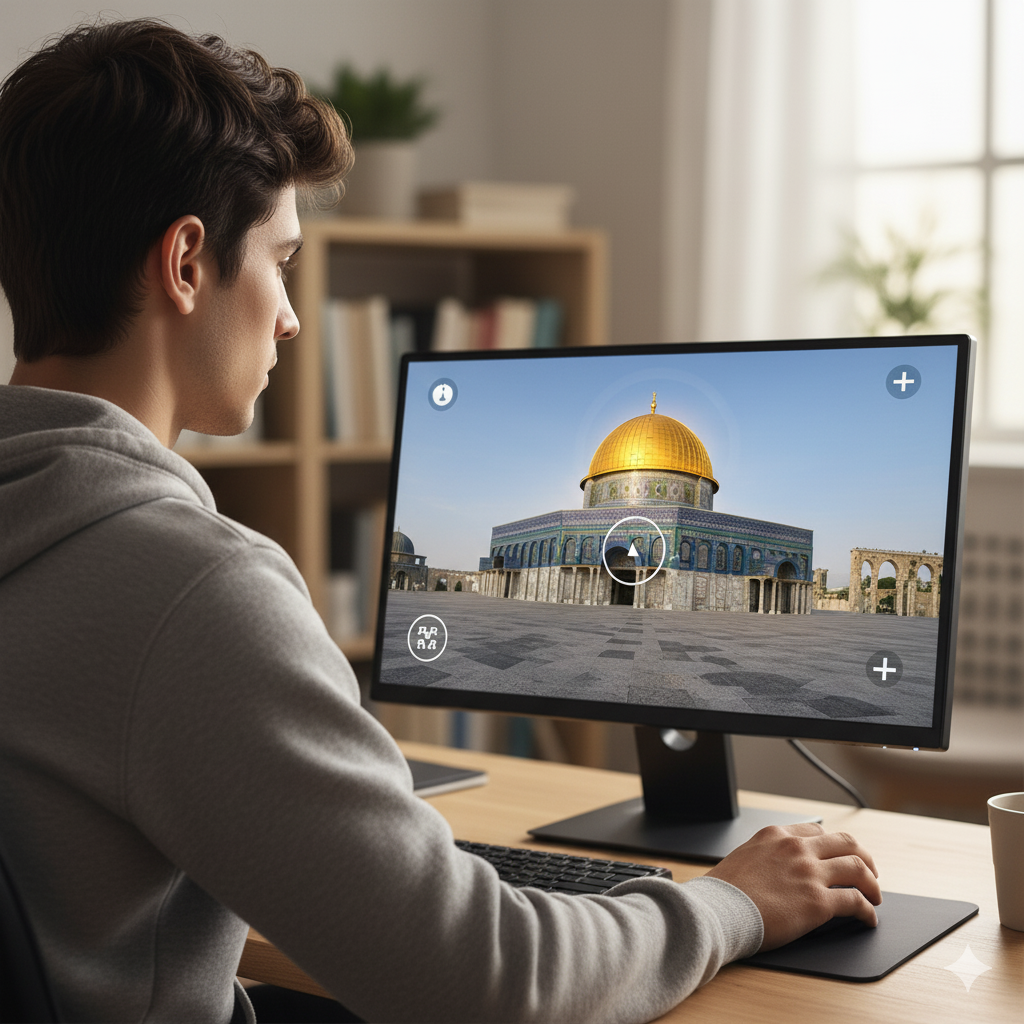
🌐 Step 3 – Publish and Share
When your tour is ready, share it with your audience:
Embed it on your website or blog
Share via a link on social media or LMS
Present it in VR mode or inside a 3walls Immersive Room
Your viewers can explore freely — by dragging their finger or mouse, or simply turning their head in VR.
💡 Example Use Cases
Teachers creating interactive history lessons
Guides building self-guided tours for travelers
Museums offering virtual access to exhibits
Communities preserving heritage through digital storytelling
🚀 Why Use The Third Product
Unlike traditional 360° editors, The Third Product combines two things in one place:
A Studio for creating and editing interactive 360° tours
A Global Library where creators can share, explore, and learn from others
It’s built by 3walls — designed for education, tourism, and culture — and supports everything from phone viewing to full-scale immersive rooms.
🧭 Conclusion
Virtual tours are more than just digital panoramas — they’re immersive experiences that connect people, places, and stories.
With tools like The Third Product, anyone can create them easily — no advanced editing skills required.
Explore. Create. Connect.
That’s the power of The Third Product.